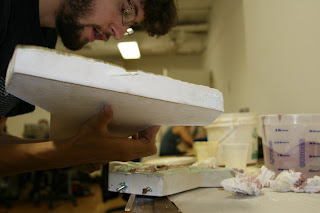
Okay, this was by far the most difficult part. I actually had to cast my puppet three times. I'm not going to bother with explaining how I fucked up. Here's a shopping list:
1) L-200 Casting Latex
2) acrylic paint
3) Flex Foam Foam It 3 (flex foam)
4) Klean Clay
First thing to do is to mix up some paint with the latex. Start by mixing up your color for skin tone. Make sure to have plenty, you'll need it for many things. Mix the paint with the latex. It should be a mixture of about 60 to 70% latex and 40 to 30% paint. More latex than paint. If it is equal then there is a chance that the latex will crack as it is bent too often.

Next paint the mold. Don't let it dry completely between coats. Put on about 5 coats. You can check the thickness by carefully lifting up an edge. I didn't paint the shoes for a few reasons. One, I want them to be completely latex. This is mainly because I imagined it'd be easier to fill it than paint it. I don't really know why I thought that. It'd probably be fine to do it the same way, just paint a skin. I used latex that isn't mixed with paint for the shoes and I plan on painting them later.


So, you've finished painting. The top layer should not be hardened yet. Put the armature in and attach the feet to the bolts. We want the final puppet to have a foam center so that it isn't too stiff. If the body is completely latex, then the body will be very stiff and un-poseable. This is what we use the foam-it for.
First: Here's how I did it for my final version. If I had another chance I would tweek it a little, so later I'll explain how I would do it.
Before we mix the foam it, there are some things to do to prepare. First, put some vaseline on all exposed parts of the mold. (you don't need to put it on the outside walls) Second, get rolls of clay ready. I like to put it on the edges of the mold so nothing can seep out. Get a board ready. When you pour the foam it, it's going to want to expand the mold, seperating the two parts. You're going to stand on it for about 10 minutes. Fourth, have a friend ready to help, once you've mixed it's a quick process, you have to move fast. Fifth, have paper down on the floor to put the mold on while you're standing on it. It can and will seep out and will stick to everything.
I filled the feet with latex (after inserting the armature. This didn't work completely and it's on of the things I would change if I did it again. I'll explain later.
Now, get some measuring cups or make some. Mix according to the directions on the foam it. It's a two to one ration b to a (if memory serves.) Mix vigorously for 20 seconds then pour quickly. Pour at the lowest part of the mold and make sure to get it in the arms and legs. Put the other half on quickly and put clay quickly on the edges. Does not have to be neat at all. In fact, if I did this again, I wouldn't do the clay.
Put the mold down on the floor on the paper and put th e board on top and stand on it for at least 10 minutes. After that set it aside and wait. I demolded the next day, this isn't necessary but I did.
Okay, here's how I would do it the second time. I would have both sides painted, with the top layer still wet. I would paint the feet, and maybe pour some latex in (with the armature in place.) Still put vaseline on the edges. Now I would put the two parts together and let the latex dry, overnight probably. If I could, I would turn the mold over every 10 minutes or so while it's drying. Once it's done drying I would pour in the foam it into the pour spout at the neck (make sure it's large enough.) This would hopefully ensure a better seal. It probably has it's problems though.
They now apparently have a foam it 8 that has a skin to it, so next time I'd probably just use that actually. And I'd make a silicone mold. The things you can do...


No comments:
Post a Comment